

A Motorcycle Assembly Line is the controlled path where separate components become a tested, road-ready machine. Frames move through fixtures while workers or robots install engines, wiring harnesses, suspension parts, wheels, and body panels. Each station has a defined task, torque specification, and inspection point. The sequence looks simple. It is not.
Industry demand gives this process serious importance. The IMARC Group’s 2024 motorcycle market report identifies rising urban mobility needs, expanding disposable incomes, and product innovation as major growth factors. Mordor Intelligence also reports that production increasingly depends on flexible manufacturing, automation, and regional supply networks. These trends pressure factories to build more models without sacrificing consistency. A modern line may use barcode tracking, digital work instructions, and electronic torque tools. A small display can confirm whether a fastener reached the correct value.
Quality remains the real measure of performance. The International Organization for Standardization’s ISO 9001 framework emphasizes controlled processes, traceability, and continual improvement. In practice, inspectors may check brake routing, chain tension, fluid levels, lighting, and engine response before final release. However, industry forecasts are estimates, not guarantees. Automation can reduce repetitive errors, but it cannot remove every judgment call. A sensor may pass.
That is why effective assembly management combines engineering data with experienced technicians. Line balance, worker training, supplier quality, and end-of-line testing must work together. One overlooked connector can create a costly delay. This article explains how the Motorcycle Assembly Line operates, why each station matters, and where real-world production still demands careful human review.
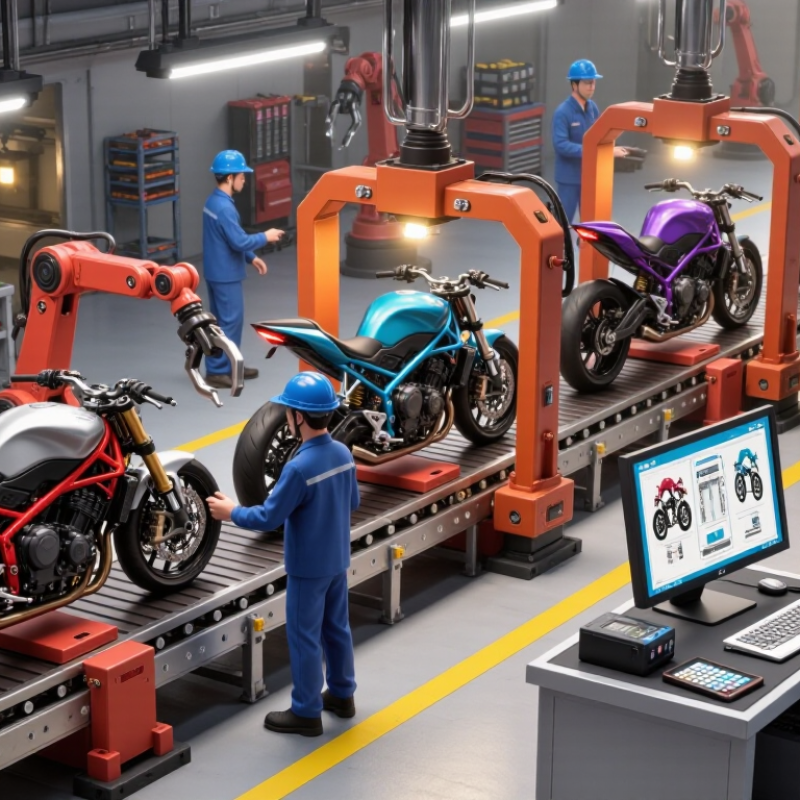
A motorcycle assembly line is a structured production system where workers, tools, and machines build motorcycles in a controlled sequence. Frames enter the line first, followed by engines, suspension parts, wheels, wiring, controls, and body panels. Each station completes a defined task before the motorcycle moves forward.
The line produces more than a finished motorcycle. It also creates tested subassemblies, such as wheel units, brake systems, instrument clusters, and engine installations. Workers use calibrated torque tools to tighten critical fasteners. They check cable routing, fluid levels, electrical connections, and panel alignment. One loose connector can stop the final inspection.
Quality checks happen throughout the process, not only at the end. A technician may inspect weld areas, measure handlebar movement, or test the lighting system. At the final station, the motorcycle receives functional checks for braking, starting, steering, and unusual vibration. No line is perfectly smooth. Parts can arrive late, and a station may need adjustment. Experienced teams record these problems and improve the process instead of hiding them. The result is a repeatable manufacturing flow with room for careful human judgment.
A motorcycle assembly line turns inspected parts into a road-ready machine. The process begins with frame preparation, where workers check welds, alignment, and mounting points. A small deviation here can create vibration later. It is easy to underestimate this station.
The engine and transmission workstation follows. Technicians install the power unit, connect wiring, and secure fuel and cooling systems. Torque-controlled tools record tightening values for critical fasteners. The chassis station then adds the front fork, wheels, brakes, suspension, and handlebars. According to the International Motorcycle Manufacturers Association, global sales exceeded 60 million two- and three-wheelers in recent industry reporting. That scale demands repeatable work, not hurried work. At the electrical station, workers test sensors, lighting, ignition, and dashboard functions. Fluids are added carefully, while contamination remains a constant concern. Final inspection checks brake response, steering movement, leaks, and engine operation.
Tip: Keep color-coded bins near each workstation. Scan every critical component before installation. A second inspection is worthwhile, even when production pressure rises. I would not treat automation as a complete solution. Human judgment still catches loose connectors, unusual sounds, and awkward cable routing. The inspection bay should include documented torque data and traceability records. Quality teams can compare defects by station and adjust training quickly. Small errors often reveal weak instructions, poor tool placement, or an unrealistic cycle time.
What Is a Motorcycle Assembly Line and How Does It Work?
A motorcycle assembly line is a planned route where separate parts become a working vehicle. Frames usually enter first after welding, cleaning, and paint inspection. Workers or guided systems move each frame between fixed stations. The frame’s identification code supports traceability during production.
Engines may arrive as complete units or move through a parallel assembly area. Technicians install pistons, covers, clutches, wiring, and lubrication systems with measured procedures. The engine then meets the frame at a joining station. Lifting equipment positions it carefully, while calibrated tools tighten mounting bolts to specified torque. Small components follow the same route. Fuel systems, brakes, wheels, suspension parts, lights, and controls are installed in a controlled order. Keep parts organized.
Quality checks happen throughout the line, not only at the end. Inspectors examine weld areas, cable routing, fluid levels, brake operation, and electrical signals. Sensors can detect missing fasteners, but human judgment still matters. A sensor may confirm presence, not correct orientation. That difference can prevent expensive mistakes.
The final motorcycle receives functional testing, including controlled starting, brake checks, steering inspection, and leak detection. Production looks smooth from outside, yet minor delays are common. A damaged connector or unclear work instruction can stop several stations. Teams review these problems, revise procedures, and sometimes discover that the “efficient” method needs improvement. Reliable assembly depends on repeatable steps, trained technicians, accurate tools, and honest inspection records.
| Production Stage | Main Activity | Primary Inputs | How Materials Move | Typical Process Characteristics | Key Quality Checks |
|---|---|---|---|---|---|
| 1. Parts Kitting | Small parts and assemblies are grouped according to the build sequence. | Fasteners, brackets, wiring sections, controls, hoses, and trim components. | Parts are delivered in labeled bins, carts, or sequenced kits beside the line. | Reduces walking, searching, and incorrect-part risks. | Part number, quantity, revision level, and barcode or electronic traceability. |
| 2. Frame Preparation | The frame is inspected, positioned in a fixture, and prepared for component installation. | Welded or cast frame, steering components, brackets, bearings, and mounting hardware. | The frame travels on a conveyor or guided carrier that maintains its orientation. | Fixtures hold mounting points in repeatable positions during assembly. | Frame identification, weld condition, dimensional alignment, and bearing fit. |
| 3. Engine Installation | The engine is lifted into the frame and secured with specified mounting hardware. | Completed engine, mounting bolts, spacers, isolators, and support fixtures. | An overhead hoist, lift table, or guided manipulator transfers the engine to the frame. | Engine installation is sequenced before many systems that connect to the power unit. | Mounting orientation, bolt presence, tightening angle or torque, and clearance. |
| 4. Front-End Assembly | The steering head, fork assembly, handlebars, front wheel, and controls are installed. | Forks, steering stem, handlebar, brake components, wheel, tire, and control cables. | Components arrive on carts or racks and are fitted directly to the framed motorcycle. | The front end is aligned to support later brake, cable, and electrical routing work. | Steering movement, wheel runout, axle installation, brake routing, and fastener torque. |
| 5. Rear Chassis Assembly | The swingarm, rear suspension, rear wheel, chain or belt drive, and related guards are fitted. | Swingarm, shock absorber, rear wheel, drive components, brake parts, and spacers. | Parts are supplied in sequence from dedicated racks near the assembly station. | Suspension and drive components must be installed without restricting movement. | Wheel alignment, drive tension, suspension travel, brake operation, and torque verification. |
| 6. Electrical and Fuel Systems | Wiring harnesses, battery connections, sensors, lighting, fuel lines, and control modules are connected. | Harnesses, connectors, battery, sensors, lamps, fuel tank, hoses, and protective sleeves. | Harnesses are routed through fixed clips and guides while the motorcycle remains on its carrier. | Routing protects wires from heat, sharp edges, vibration, and moving parts. | Connector seating, polarity, continuity, leak prevention, and harness clearance. |
| 7. Exhaust and Body Components | The exhaust system, seat, fenders, side panels, tank covers, and other exterior parts are installed. | Exhaust sections, heat shields, seat, plastic or metal panels, fasteners, and seals. | Large parts are delivered on protective carts or racks to prevent surface damage. | Appearance-sensitive operations are performed with protective covers and controlled handling. | Panel gaps, surface condition, exhaust clearance, heat-shield security, and seat locking. |
| 8. Fluids and Adjustments | Required fluids are added and operating controls are adjusted to specification. | Engine oil, coolant where applicable, brake fluid, fuel, lubricants, and adjustment tools. | Metered filling equipment and portable service tools are positioned at the station. | Dispensing equipment helps control quantity and reduce contamination or spillage. | Fluid quantity, visible leaks, brake feel, throttle return, clutch operation, and control free play. |
| 9. End-of-Line Testing | The completed motorcycle undergoes functional, electrical, safety, and appearance checks. | Diagnostic equipment, brake testers, roller or dynamometer equipment where required, and inspection forms. | Motorcycles leave the assembly conveyor for a controlled test area or inspection lane. | Defects are recorded electronically or on standardized inspection documents for correction. | Starting, charging, lighting, instrument operation, brake performance, emissions compliance where applicable, and fastener audit. |
| 10. Final Release and Packing | Approved motorcycles receive final documentation, protection, and shipment preparation. | Inspection records, protective materials, shipping supports, labels, and owner documentation. | Motorcycles move to a holding area, shipping crate, or transport staging lane. | Traceability links the finished vehicle to its build record and inspection results. | Vehicle identification, damage inspection, accessory completeness, packaging security, and release authorization. |
A motorcycle assembly line turns separate components into a working machine through controlled, repeatable steps. The process usually begins with a bare frame. Technicians inspect welds, measure alignment, and attach the steering head, swingarm, and suspension mounts. Small errors matter here. A frame can look perfect and still require adjustment.
The engine and transmission are installed next, often with lifting equipment and torque-controlled tools. Workers connect the wiring harness, fuel system, cooling lines, and exhaust components. Wheels, brakes, handlebars, lights, and controls follow. At each station, trained inspectors check fasteners, cable routing, fluid levels, and electrical signals. The motorcycle then receives its body panels, seat, and protective finish. Paint quality is checked under bright lighting because dust and uneven color become obvious.
Tips: Keep parts organized by station, use calibrated tools, and record every inspection. Never trust appearance alone. A connector may seem secure but fail during vibration testing.
After assembly, technicians fill approved fluids, adjust controls, and test the motorcycle on rollers or a controlled track. They check braking response, steering stability, throttle operation, noise, and leakage. Some issues are surprisingly small, such as a loose clamp or poorly routed cable. These details reveal why experienced inspection remains essential, even when the line appears efficient. Perfect production is difficult; careful correction is part of the craft.
A motorcycle assembly line turns separate components into a road-ready machine through controlled, repeatable steps. Frames, engines, wiring, wheels, and controls move between trained workstations. At each station, technicians check fit, torque, alignment, and routing before the motorcycle advances. Small errors can create vibration, leaks, or unsafe handling later.
Quality testing gives the process measurable evidence. Technicians verify fastener torque with calibrated tools and inspect welds, cables, brake lines, and fluid connections. Electrical checks confirm lighting, switches, sensors, and starting functions. A roller test may examine braking response, acceleration, noise, and unusual vibration. Final inspection then reviews paint surfaces, panel gaps, tire pressure, fluid levels, and identification records. The motorcycle should also receive a controlled road test when procedures require it. No inspection system is perfect. A rushed check can miss a loose connector, so independent review remains valuable.
Tips: Use a written checklist for every unit. Record torque readings, not only pass or fail results. Watch for fingerprints, scuffs, and uneven gaps; they often reveal handling problems. Keep test equipment calibrated and traceable. If a result seems unusual, stop the line and investigate it. That delay is usually cheaper than repairing a customer’s machine. Technicians should also report recurring defects, even when they appear minor. Patterns matter.
Quality testing is performed throughout motorcycle assembly rather than only at the end. The chart shows the relative number of standard quality-control checkpoints commonly applied at each major stage, including torque verification, component fit, electrical testing, brake checks, fluid inspection, and final road-simulation testing.
The values are non-brand reference data representing a typical motorcycle production workflow. Final inspection combines the results of all previous quality gates before release.
© 1999-2025 The Lincoln Electric Company